


Day 1 with Flywheel
Flywheel does almost everything for you after you integrate a data source. That’s actually the first 5 of the 15 minutes from this explainer. However, there are a few areas of the product you can optimize to make Flywheel your own.
After connecting a data source, such as Flywheel.js, Segment, or Intercom, take the following steps to customize your Flywheel instance.
Define your event Milestones
Choose Goals for your Assets
Assign Tags to your Assets
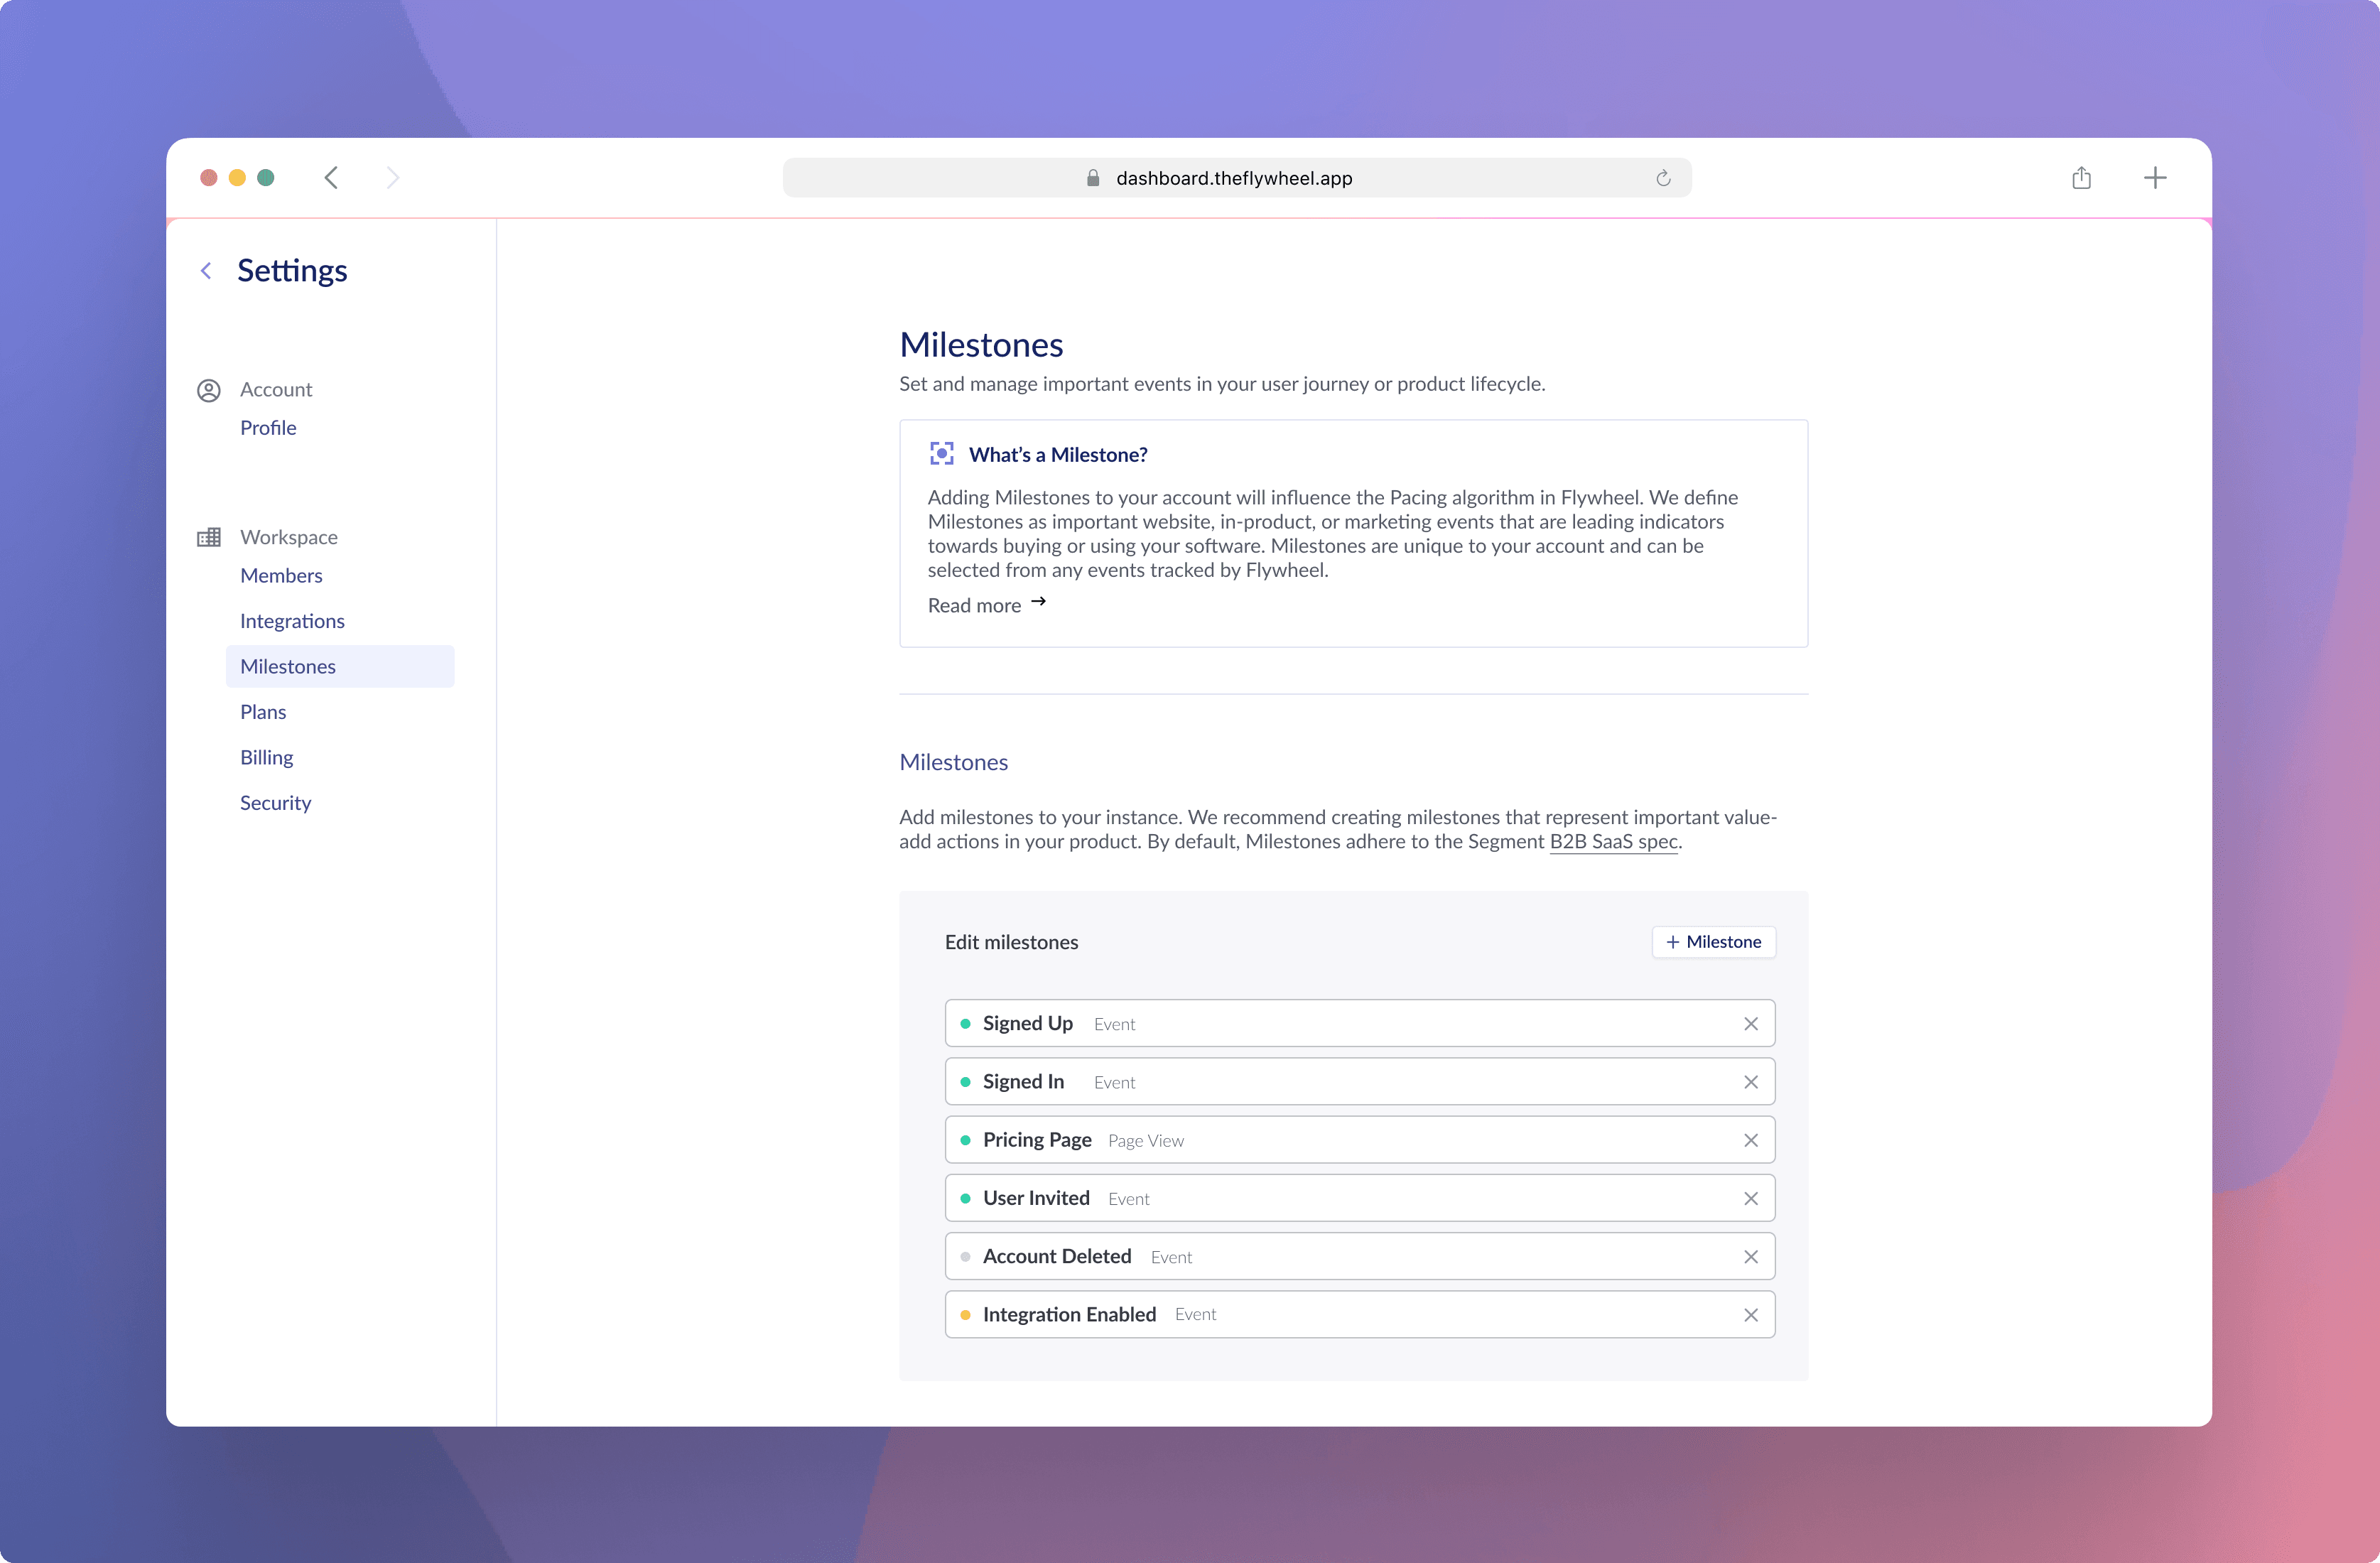
1. Define your event Milestones
Milestones can be added in the Settings for any Flywheel instance. By default, Flywheel comes pre-loaded with basic Milestones that adhere to the Segment B2B SaaS spec. Feel free to customize the Milestones in your instance to match your product adoption journey.
The events and pages available to be selected as Milestones have to have been triggered after integrating with Flywheel. If you aren’t seeing a specific event, try triggering it manually.
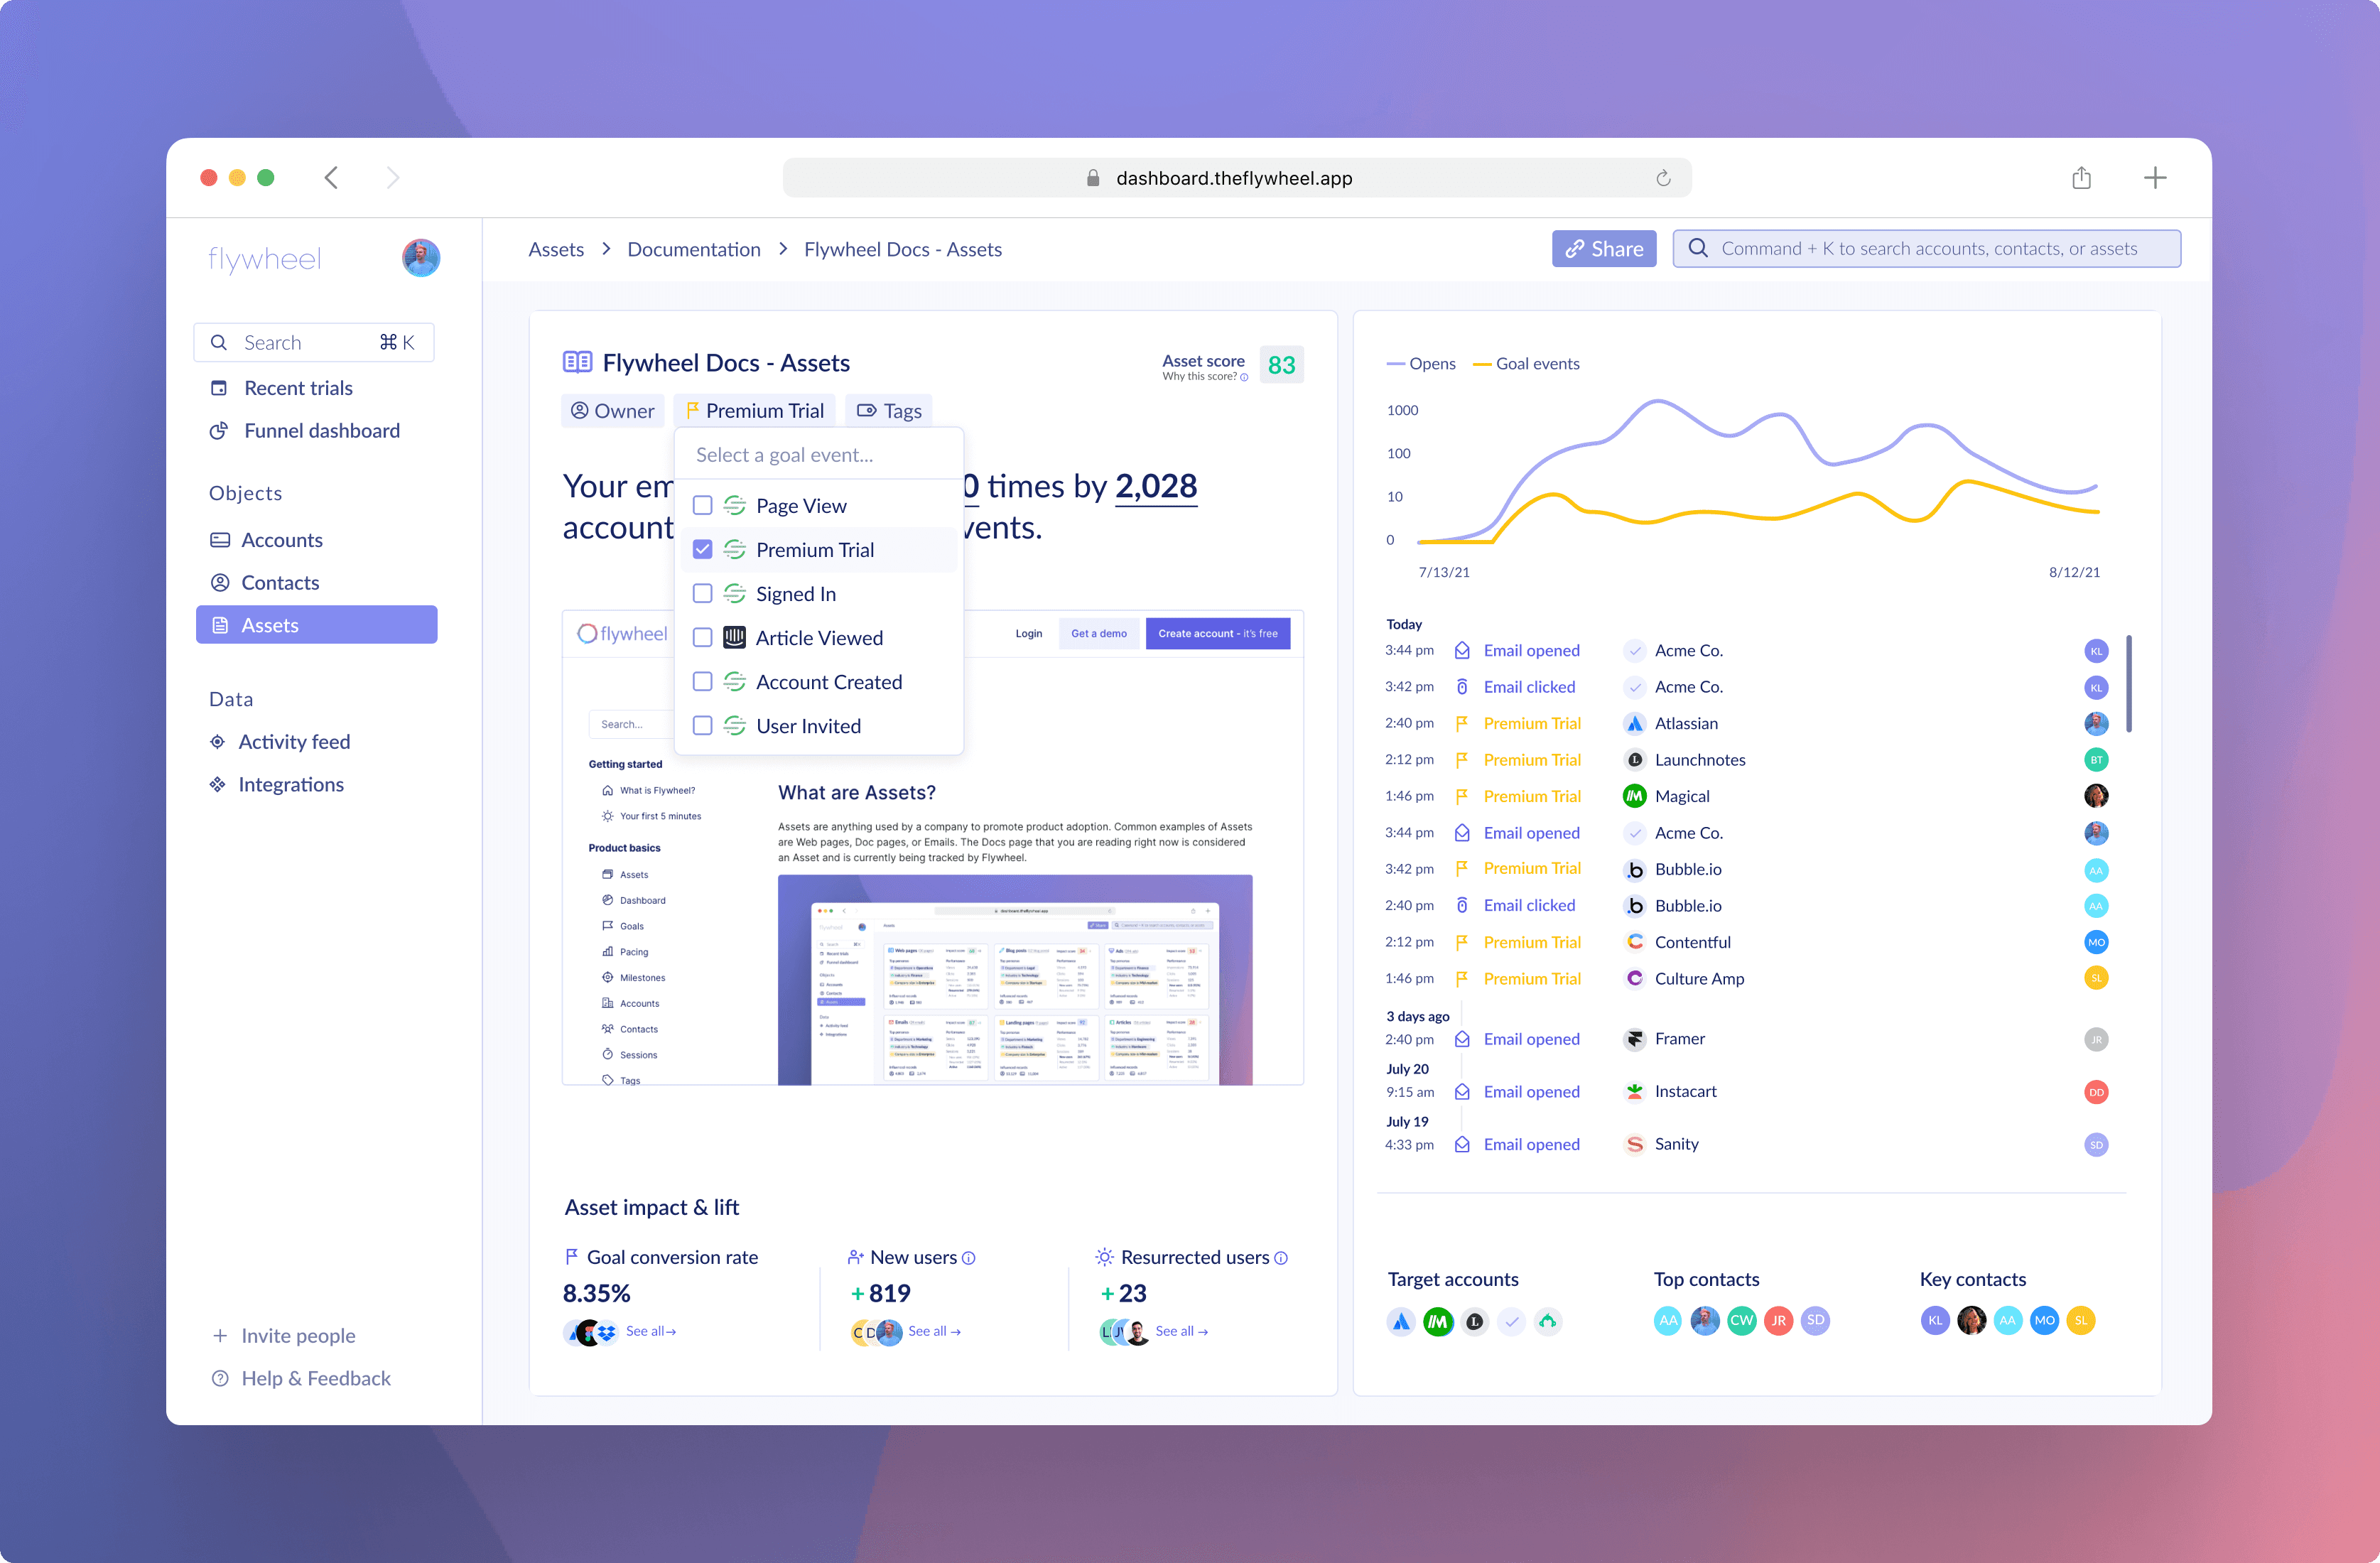
2. Choose Goals for your Assets
Every Asset can have a corresponding Goal. Just like Milestones, an event or page has to have been triggered to be an option. Unlike Milestones, however, there are no default Goals in Flywheel. Every goal needs to be selected from the available list of events and pages.
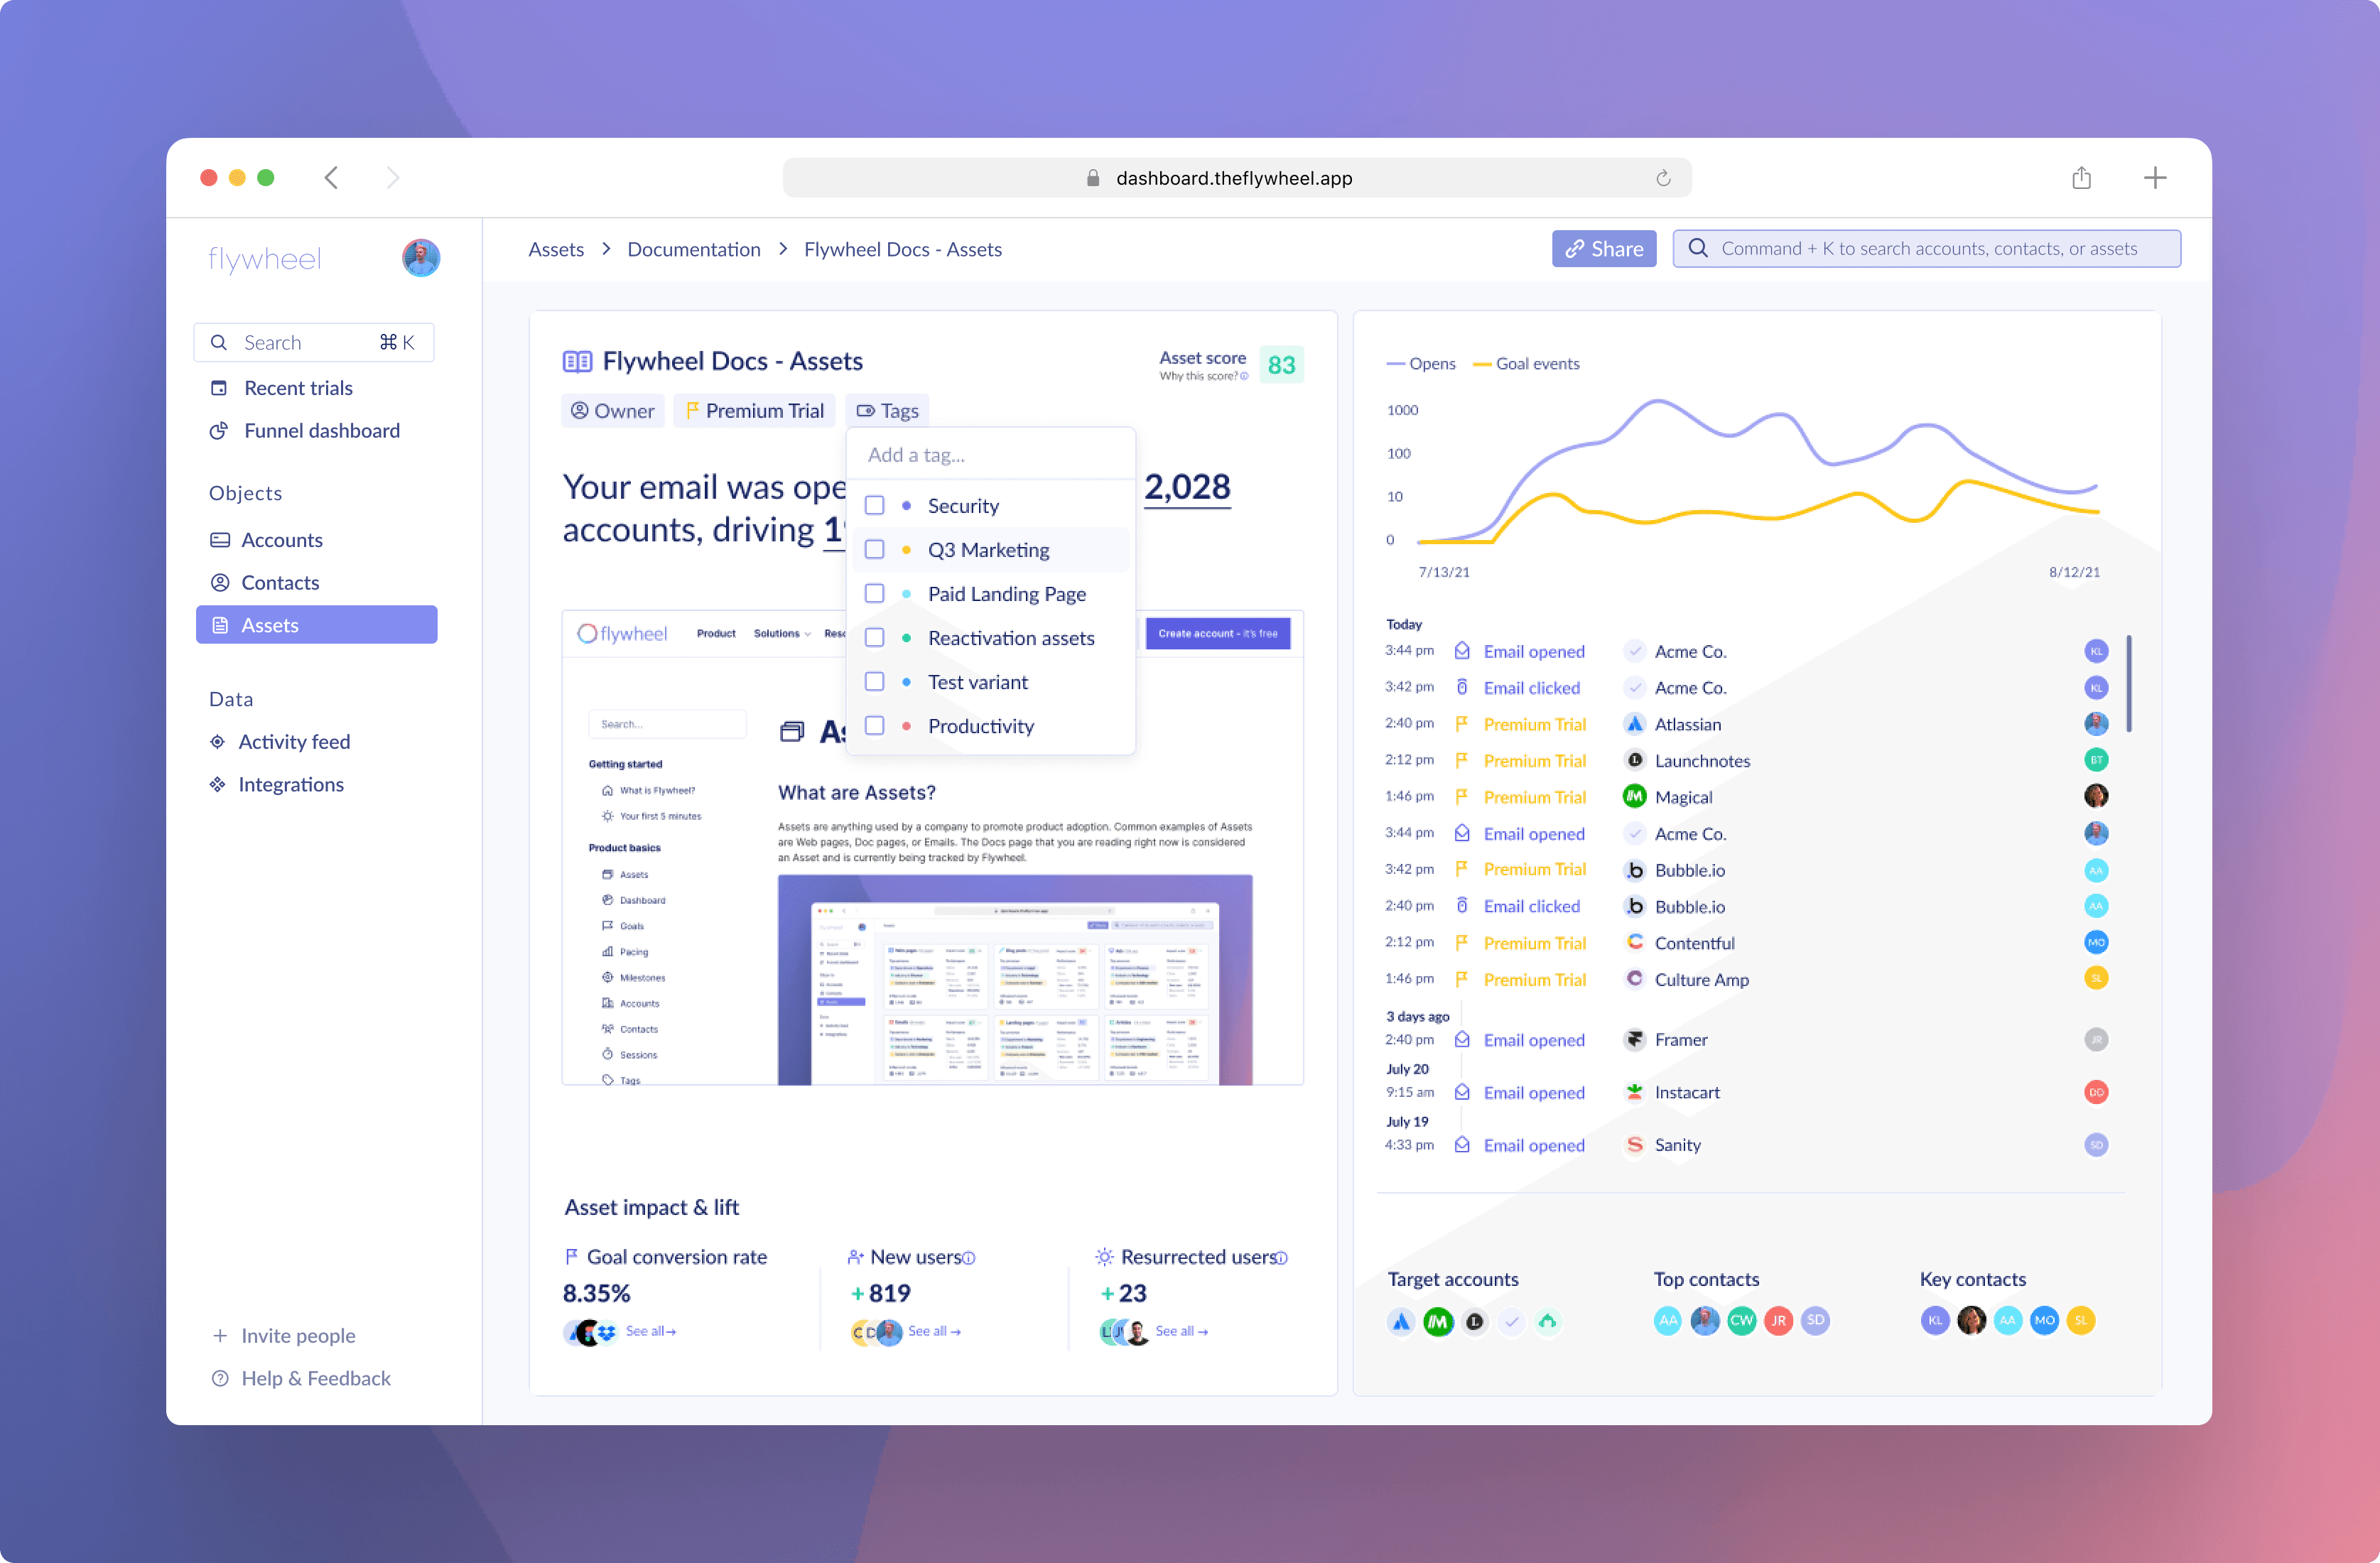
3. Assign Tags to your Assets
Tags are a great way to place your Assets in flexible, adaptable groups. Simply start typing in the Tags box to create new options, or search for existing Tags.
Congrats, you did it! Now you can bask in your setup and continue making optimizations over time. If you run into any issues, let us know right away via Intercom or email.